A Wondrous World of Family Hiking in Muir Grove


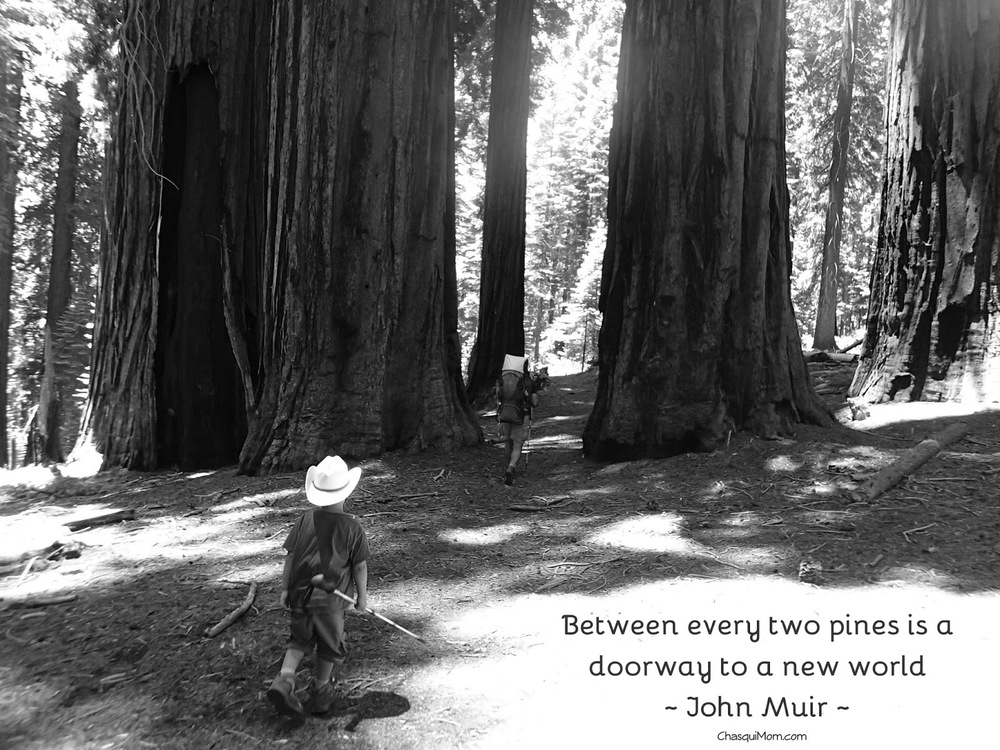
Between every two pines is a doorway to a new world
~ John Muir ~

Have you ever seen a child romp through the forest? Have you listened to a child talking while walking through the mountains? Sure, hiking with children is difficult, slower, tedious and harder on your back, but there is a different level of wonder that is seen through a child's eyes.

Muir Grove in Sequoia National Park might not be a big attraction but it truly is a nice hike.  The great thing about Sequoia National Park is that there are Sequoias very near the General's Highway.  This gives great accessibility BUT this also means very large crowds which is something my family is not a big fan of.  We wanted to see the Sequoias but wanted the solitude of the "Outdoors", so off we headed hiking to Muir Woods near Dorst Creek Campground.


Hiking to the Sequoias

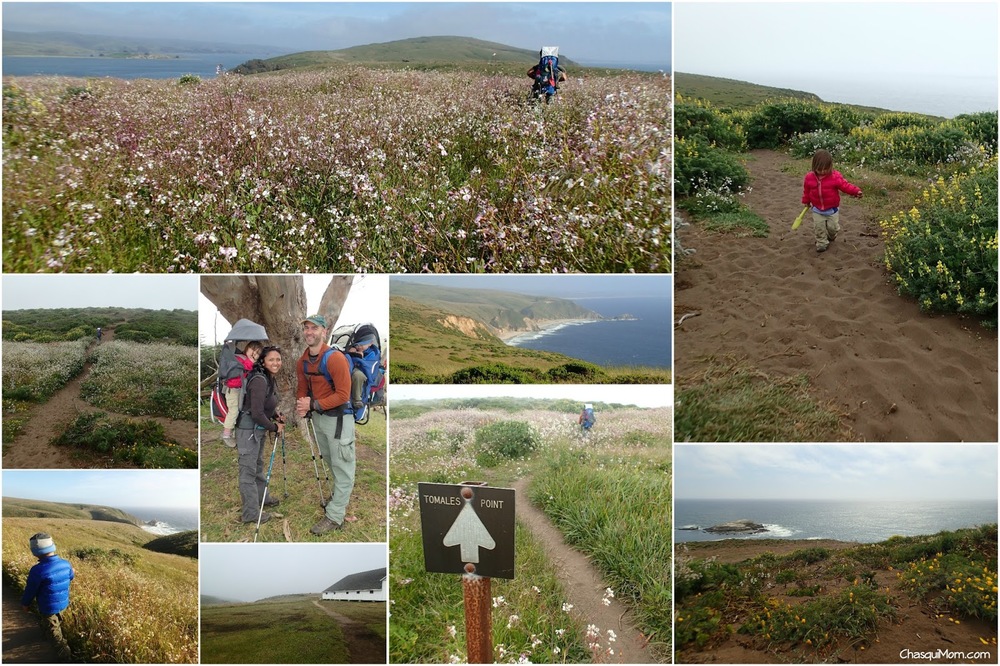
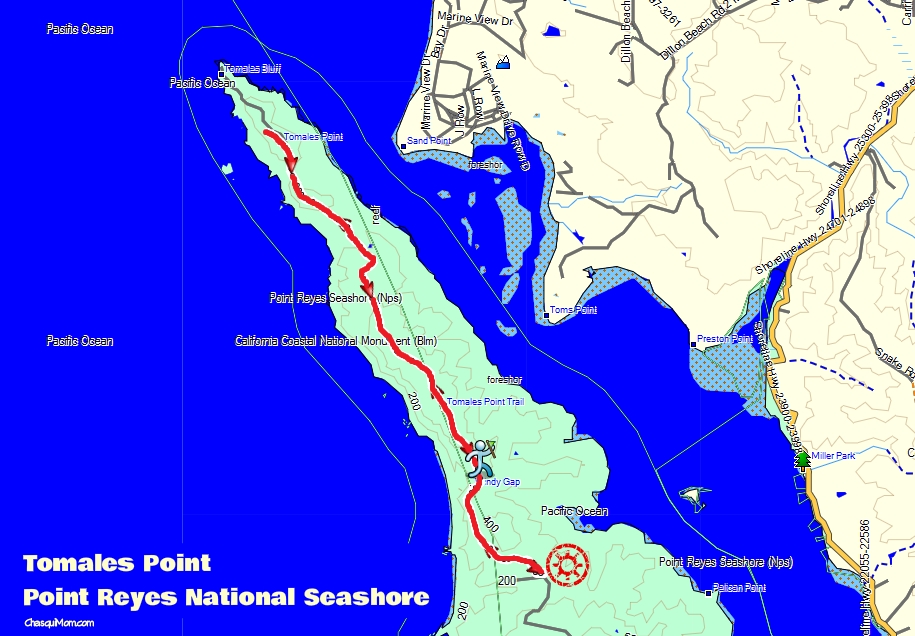
This is a moderate, family-friendly, 4.2 mile round trip hike to Muir Grove, but in all reality we added a little over 2 miles for a total of 6.3 miles from our campground in Dorst Creek.  We walked from our campsite to the trailhead but we got a little confused about where it was, we eventually found the Muir Grove trailhead but added two miles over all to the hike.  Every step adds up when you think about it.  The trailhead is near the campsite #178, which crosses a little bridge over Cabin Creek.


Immediately on the trail, we enjoyed the sounds of the flowing Cabin Creek and were glad the creek was not dried up yet due to California's severe drought.  It was quite refreshing to hear water flowing and to see the greenery all around us.

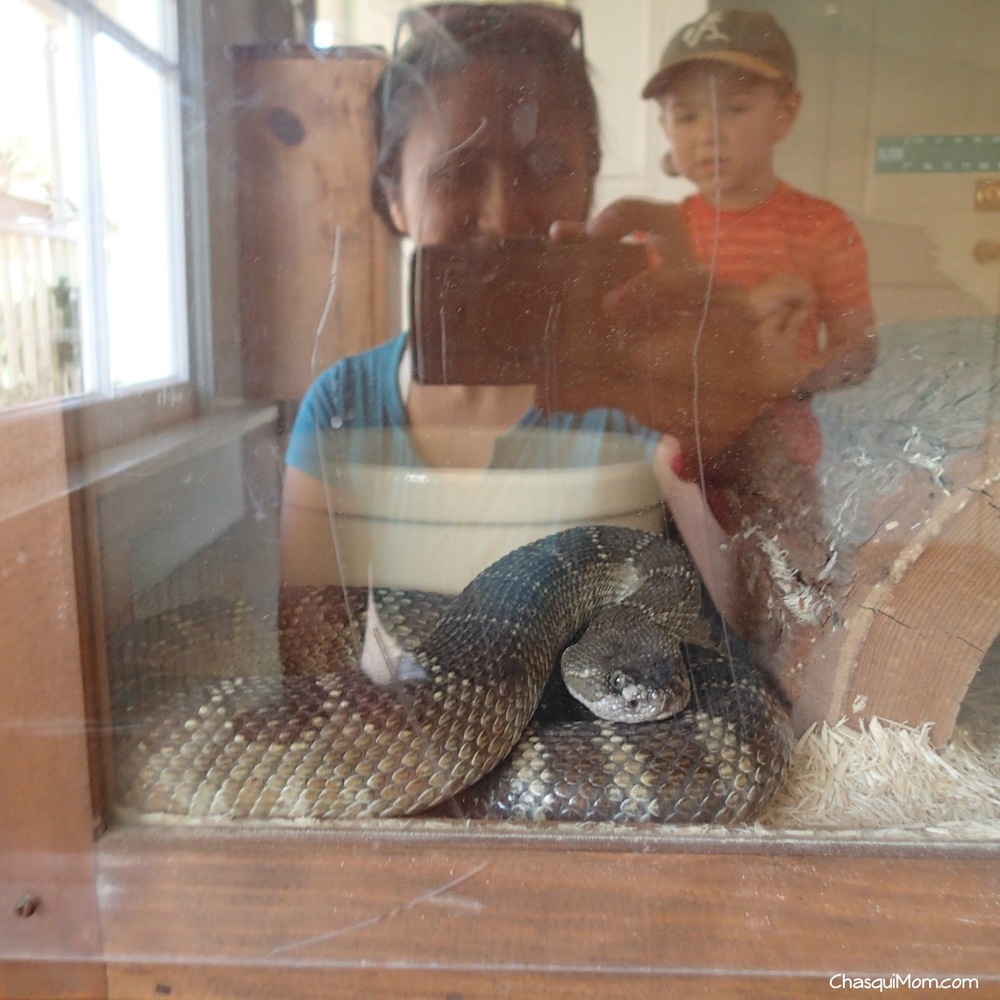
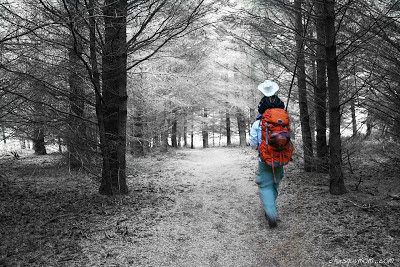
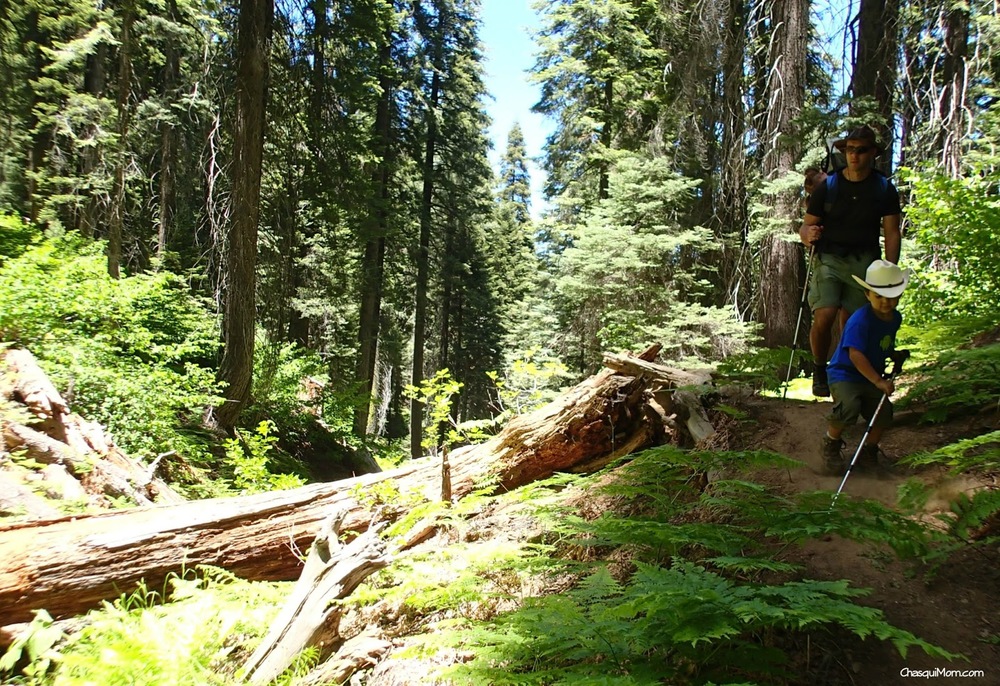
The hike has a slight uphill trail to Muir Grove with sections of flat and down hill sections.  The trail is a very shaded with just one section of exposed granite halfway to Muir Grove.  There were signs of bears everywhere....almost every fallen tree had been shredded by bears so we made sure our son never ran ahead.  I happily told my son to blow his whistle as much as he wanted!  Thankfully we never saw a bear while hiking to Muir Grove.  All we saw was lush beautiful forest greenery!!


Ferns galore...


Just hiking along...


My daughters view point from down below...

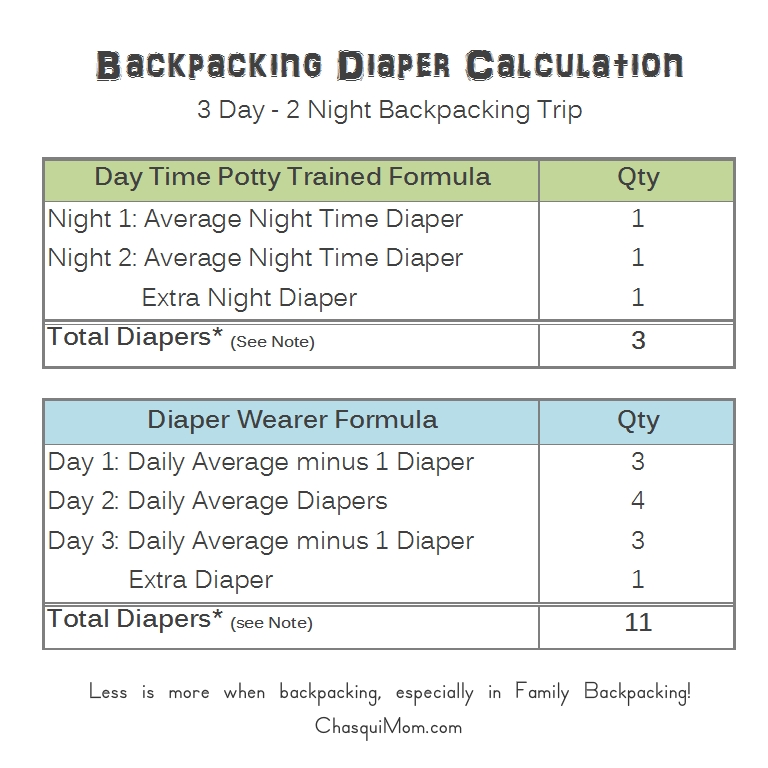
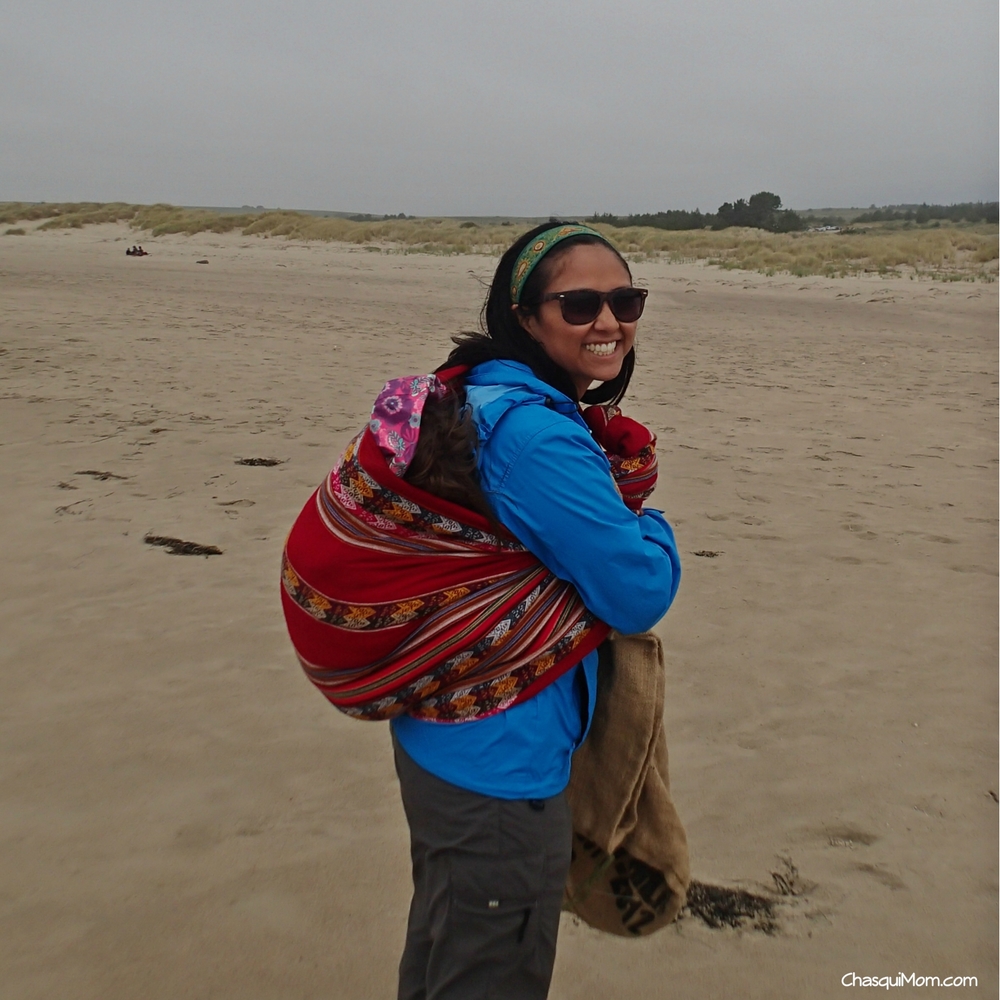
I would suggest taking a kid carrier for little ones who can't hike this distance.  My 4 year old son was able to hike the entire 6.3 miles but my 2 year old could not.  Of course when we saw the Sequoias down the trail, everyone got excited to see the REALLY BIG TREES!!

Entering Muir Grove

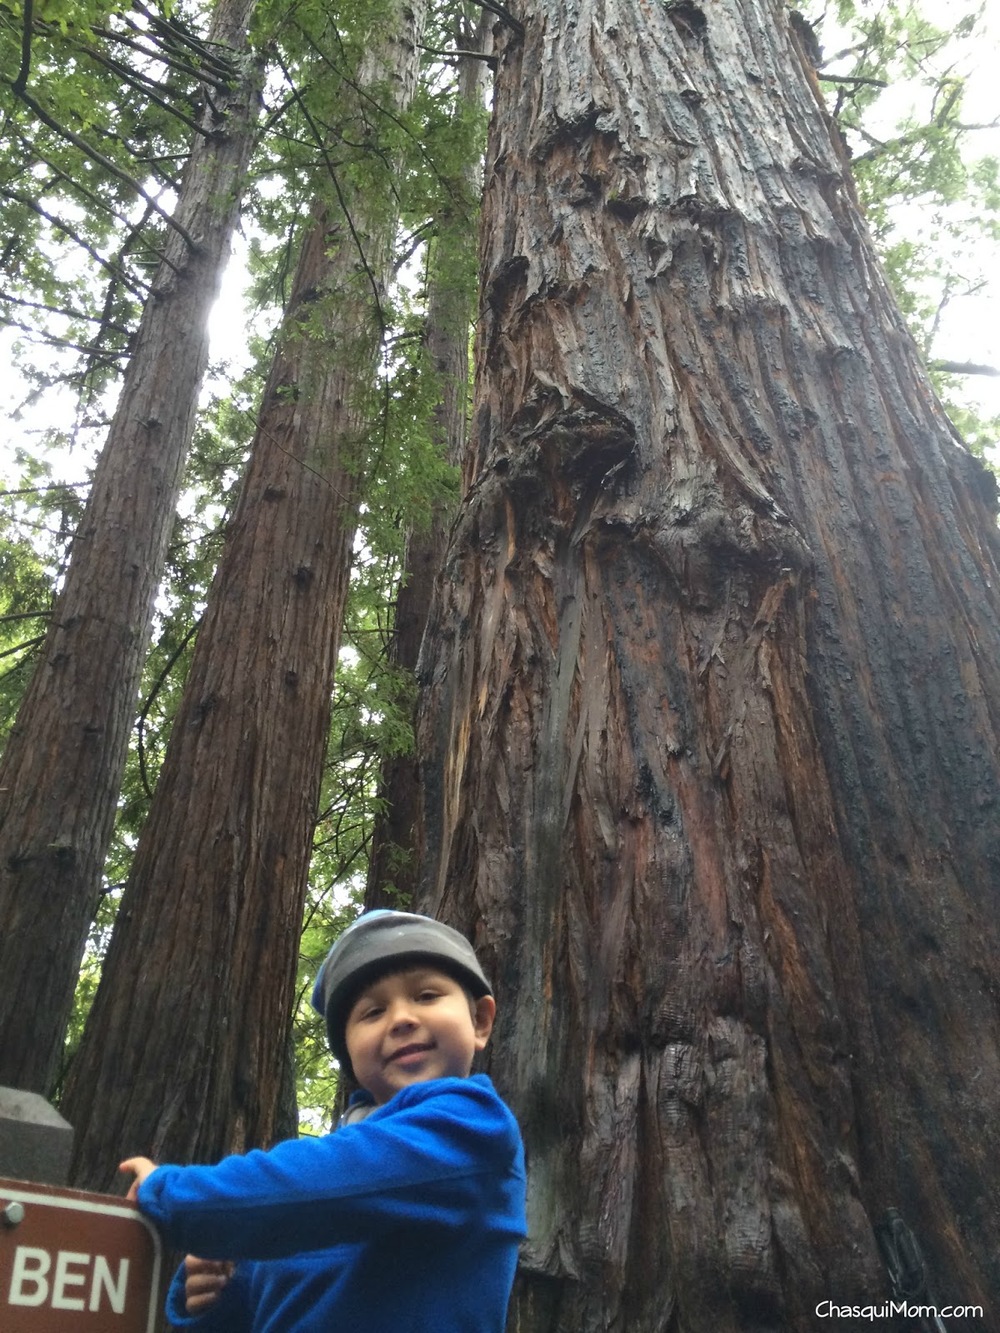
Doesn't matter how many times I see Sequoias I'm always blown away by their sheer size.  They provide a perspective that only Sequoias can provide.  Just seeing the Sequoias brought back my happy childhood memories of endlessly running around the base of the trees with my older brother. I was very happy we had hiked out to Muir Grove with my children.


"Daddy, Mommy! Those trees are REALLY BIG! And they have caves!" my toddlers squealed.  Now I understand why my parents brought my brother and me to Sequoia National Park so much.

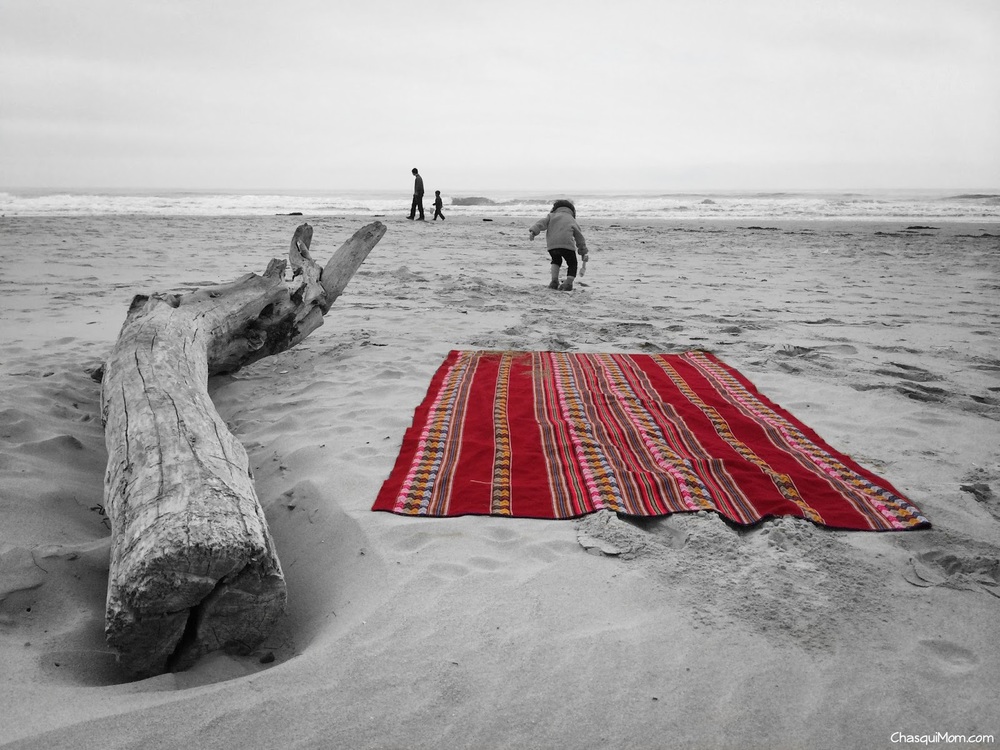
When we arrived to Muir Grove, a couple of hikers were having lunch but they quickly packed up and left.  We packed our lunch as well: Bolillo sandwiches.  We enjoyed a picnic all by ourselves in the middle of Muir Grove.  After lunch, my son and I explored the "caves" and I happily listened to my son imagining finding bears in the tree hollows and pretending to scare them.  A little bit of family time at Muir Grove....


Time to EXPLORE....


Daughter hugging daddy, surrounded by the Sequoias hugging us....


Always look up....


The world from inside the tree, from my daughters eyes....

I must say this might not be a popular hike in Sequoia National Park but it was my family favorite.  Muir Grove...where we played hide and seek, had Bolillo sandwiches and pretended we were giant bears in the tree trunks.  Welcome to the world of family hiking, it's more fun this way.


Trail Report Detials
Who: Two Adults, Two Toddlers
Family Friendly: Moderate
Mileage: 4.2 miles from Trailhead, 6.3 actual from campsite


Elevation Change: 896 ft
Trails Description: Out and back trail, slight uphill hike


What's your favorite day hike in Sequoia National Park?


Join in on the conversation by leaving a comment here! You can also join in on the conversations on Chasqui Mom's FacebookInstagram and Twitter that is updated daily with outdoor activities and other wonderful posts and links from #OutdoorFamilies!

Related Posts and Links:

The Amazing Crystal Cave at Sequoia National Park

One of my childhood dreams was to visit the Crystal Cave in Sequoia National Park.  Unfortunately the one time my parents tried to take us to the Crystal Caves the trail was covered with ice (during summer time!), so the National Park Service wasn't allowing visitors due to the slippery trail.


Years had past and I never visited, so we when we were planning our Sequoia trip this past June I made sure we were going to visit the beautiful stalactites and stalagmites!  There are really no words to describe the wonderful underground world but here are some tips and information about the Crystal Cave.

There is a little bit of hiking to get to the cave 1/2 mile for a total of a 1 mile hike roundtrip, this does not include the walking inside the cave.  Very easy hike down to the cave but that means a steep hike up to the parking lot.


Tips for Families with Children


  • Soft Kid Carrier ~ A full blown kid carrier is probably over doing it for this 1-mile hike since ANY type of kid carrier is not allowed into the caves.  All bags, backpacks, kid carrier (fabric too) has to be left at the cave entrance.
  • Water ~ Bottled water is not allowed inside the cave but you can take the water and leave at the entrance of the cave.  We didn't bring any water which wasn't a big deal on the way down but we all got a little thirsty on the hike up.  Bring water down and leave it at the entrance before entering the cave.
  • Extra Layer ~ The cave is ALWAYS 50 degrees Fahrenheit, no matter what the weather is outside the cave.  It was in the 80's when we visited in late June, at first it felt great to be in this "natural air conditioned" cave but the change it temperature does make it chilly after a sweaty hike.  Take sweaters for the whole family especially for little ones who cool off quicker.
  • Darkness ~ Caves are dark, but they do have lighted areas or else we could not see all the great rock formations.  My toddlers enjoyed the semi-darkness but at one point of the tour, the guide turned off all the lights and it was completely dark.  Make sure you are holding your child, especially if they are scared of the dark.  No flashlights or flash photography is allowed.
  • Pricing and Ticket Location ~ Adults were $15/ticket, 5-12 years $8/ticket and under 5 years $5 ticket.  Tickets are not sold at the actual Crystal Cave bookstore.   Purchase tickets at one of the visitor centers.


The Crystal Cave Tour

The tour actually starts half an hour BEFORE the schedule ticket, i.e. 3:30 pm ticket time, meetup with guide at the book store at 3:00 pm to have enough time to hike down to the cave entrance.  If you get down early there is a beautiful waterfall and creek to relax by. Traffic to the Crystal Cave can be quite a hassle due to all of Sequoia's road construction, so we left 2 hours before our schedule time per the docents suggestion.  Photography is allowed but with NO FLASH, fortunately my camera had a nifty nighttime feature that allowed my pictures to come out.  I can describe the caves to you but I'd rather show pictures!


Walking through the first level....


My kids thought these were icicles and everything was snow to them...


The cave family...


Fairyland, those little stalactites were 100 years old....


Stalagmite (coming from the ground) aka Jabba the Hutt...


 Chasqui Mom Last Thoughts.....

I truly was beyond amazed by Crystal Cave, I couldn't even pay attention to the guide explaining how this beautiful place was created because I was so mesmerized by this place.  Something about the water flowing above and through the cave created it, over thousands and thousands of years. It was a family favorite during our week-long vacation at Sequoia National Park and my kids definitely have a fascination with caves now!

It might be a little touristy location for an outdoor enthusiast but I highly recommend visiting this Crystal Cave.  I'm glad that many years ago some National Park Rangers slid down this mountain on their butts and found the beautiful California treasure by accident.  Now thousands of people can experience this amazing place in addition to everything else Sequoia National Park has to offer.


Have you visited Crystal Cave or a similar marble cave? What did you love?


Join in on the conversation by leaving a comment here! You can also join in on the conversations on Chasqui Mom's FacebookInstagram and Twitter that is updated daily with outdoor activities and other wonderful posts and links from #OutdoorFamilies!

Related Posts and Links:
  1. Crystal Cave ~ Sequoia Natural History Association
  2. Pinnacles National Park ~ Bear Gulch Caves

Family Backpacking Series: How to Deal with Diapers and Potty Issues

Backpacking with toddlers isn't impossible!  We have had multiple successful backpacking trips with our toddlers since our youngest was in diapers.  Don't worry there will NOT be any pictures of my children on the toilet or any gross bathroom pictures.  The most common question I get from my readers about family backpacking is the bathroom issue with diapers and potty training.


"What do you do with diapers in the backcountry?
What about potty training on the trail?
What about accidents?"

Thankfully my children are almost fully potty trained and my days of diapers are almost over so I would love to impart my "Diaper and Potty Training" backpacking wisdom with anyone who is willing to go backpacking with little ones.


Diaper and Potty Training Equipment

  1. Disposable Diapers
  2. Baby Wipes and Toilet Paper
  3. Sanitation Trowel AKA "Poop Shovel"
  4. Extra Clothes for Accidents
  5. Freezer Gallon Bags and Sandwich Bags
  6. Hand Sanitizer
Diaper and Extra Clothing Calculation

I have a boy and a girl so as a mom of both genders, I have learned that boys and girls are different in the manner they go to the bathroom, especially in the angle of pee. Usually as parents, especially those with diaper wearing little ones, tend to OVERPACK especially when traveling, I am one of those! But when it comes with backpacking with little ones that is the worst thing you can do.

  • Diaper Wearing Babies/Toddlers ~ In the few days/week before going on your backpacking trip count how many diapers your child uses in a day.  Our first backpacking trip was when my daughter was 19 months old and was still in diapers.  Her diaper calculation was 3-4 diapers during the day and 1 diaper at night = 5-6 diapers in a 24 hour period.

*NOTE: Change your child's diaper RIGHT BEFORE you hit the trail and leave extras (not the calculation extras)
in your vehicle. Hence the reduction of one diaper in the average use of daily diapers on Day 1 & 3.  
  • Clean Diapers ~ Keep all clean diapers with all your toiletries at night.  Keep one diaper in your tent at night in case your child leaks.  One clean diaper won't have a bear tearing into your tent, well I hope, I'm still alive!
  • Clothing for Accidents ~ Whether you have a diaper wearing baby/toddler or in-process potty training toddler, you need to bring extra clothing in case of accidents.  For this reason, I HIGHLY suggest purchasing quick drying, wicking clothes for babies and toddlers.  Why you may ask? You only want to bring ONE extra set of clothing, so the wet/soiled clothing can be washed and dried in case you need to use it again during the rest of the trek.  I'm not one of those who say "Cotton Kills" but if you don't have "Hiking Clothes" for your children bring clothes that are light and could dry quicker than jeans.
  • Underwear Calculation ~ This really doesn't need a chart but one underwear a day plus one extra.  You can always wash a urinated underwear to wear the next day.

The Diaper Disposal

Sorry to burst your bubble but those dirty diapers just have to come along until your trek is done.  As part of Leave No Trace, you MUST pack out the soiled diapers.  Though there are somethings you can do to minimize the fact you are carrying human waste:

Do kids go in bear boxes?!
  • Backcountry Sites with Trash Cans ~ What?! There are hike-in or backcountry locations with trash cans as in our first family backpacking trip at Point Reyes National Seashore.  Of course you still want to minimize trash in these campsites, but it was really nice to be able to throw away diapers.
  • Bear Boxes, Canisters and Ziplock Bags ~  Let's start with what to do immediately after a dirty diaper is changed:
    • Stuff the diaper in a sandwich bag along with the baby wipes if it fits.
    • Put the diaper stuffed bag into a large freezer storage Ziplock, preferable with freezer bag with the zipper top.
    • Bear Country: Designate one bear canister as the trash canister and use that one to put the dirty diapers along with your other trash.  Proceed with normal bear canister procedures for your area (hanging, canisters at safe distance etc).  If your location provides bear boxes then keep the dirty diapers (in the freezer bags) in the bear box.  Even if you are not in bear country, like Point Reyes, still keep the dirty diapers in the bear boxes because there are other pesky wildlife around that would love to eat your child's diaper. Gross.
  • Poop Disposal ~ If the poop is solid (sorry...) and easily falls out of the diaper, dig a hole and bury it so you have less weight and smelliness on your trek.  Follow Leave No Trace, Principle No.3 Dispose of Waste Properly.  

Going "Potty" Outdoors

This section can be applied to day hiking as well, which I highly suggest can be used as an opportunity to practice for backpacking trips!  Obviously boys and girls go to bathroom differently and even though I believe we are equal, boys just have it easier when having to pee than girls.  So I will start with the how to go #2 outdoors since that is the same for boys and girls.

  1. Pull their pants and underwear ALL the way down to ankles.
  2. Hold their hands and have them "Sit down" on the invisible toilet, pretty much squat with their bottom sticking out as far as they can without falling over.
  3. Clean their bottom! Make sure you have baby wipes/toilet paper. poop shovel, hand sanitizer near by, before this point.  Baby wipes/toilet paper should be put in your sandwich bag or trash bag.
  4. Dig the hole with the poop shovel (Leave No Trace, Principle No.3), push the poop in with a STICK NOT THE POOP SHOVEL!! Cover it up.
  • Peeing for Girls ~ The same as going #2, except you don't need to dig a hole and have them spread their feet more so the urine doesn't dribble down her legs.
  • Peeing for Boys ~ Same as peeing in a toilet.  Just make sure their pants are pulled down far enough.
  • Ask every 15 mins if they have to pee, especially before putting them in the kid carrier!
You can also have them practice in your backyard, so its not so traumatic when you are backpacking or hiking.  Remember going "potty" outdoors might be scary for toddlers so make sure a parent is always with them when they have to go.  Diapers and potty training is part of parenthood and learning how to deal with this issue can be frustrating just at home.  But I can testify that backpacking with toddlers in diapers and in-process potty training trainees can be done!


Do you have any tips in dealing with diapers and going "potty" while backpacking?


Join in on the conversation by leaving a comment here! You can also join in on the conversations on Chasqui Mom's FacebookInstagram and Twitter that is updated daily with outdoor activities and other wonderful posts and links from #OutdoorFamilies!

Related Posts and Links:

  1. Toddler Hiking Cycle
  2. Backpacking in Point Reyes National Seashore

The Simplicity of the "Manta"

Back in 2009, when I was roaming the streets of Cuzco I asked an Andean woman where I could get a carrier like the one she had. She smiled at me and said, "It's the one you use on your table!"  We laughed, told her I already had one and thanked her.  My Peruvian tablecloth is definitely a staple in my outdoor gear which was given to me by my "Tia" (Aunt) when they immigrated to the United States.


On a cold, almost summer day, my family and I volunteered for a Clean Up Day at Limantour Beach in Point Reyes National Seashore.  Unfortunately I had forgotten one of the THREE kid carriers I own, so I improvised and used my Peruvian Blanket, tablecloth, "manta" as one of it's intended purposes: to carry my child.  


My daughter happily climbed into her "Peru Blankie" and was happy as can be.  

As a blogger many companies reach out to me to test their newest and coolest gear and I'm happy to accept.  Many times parents think we NEED the best and right gear before heading outdoors with our children or else we can't go...but I think back to my ancestors who never have a external frame kid carrier, fancy boots or wicking clothes and they carried their little ones in their "mantas" all up and down the Peruvian Andean Mountains.


So here's to all the mothers who for thousands of years have carried their babies in their "mantas" just like mine.  Thanks for reminding me of simplicity.


Do you have any cultural pieces that you use for the outdoors?


Join in on the conversation by leaving a comment here! You can also join in on the conversations on Chasqui Mom's FacebookInstagram and Twitter that is updated daily with outdoor activities and other wonderful posts and links from #OutdoorFamilies!

Drinking from the Source: LifeStraw® Review & Giveaway


Ever since I saw the LifeStraw® in an outdoor magazine a few years ago, I've been very interested in trying out this personal water filter in the outdoors.  We are a hiking, backpacking family so having access to safe drinking water is always a concern of ours, especially for our toddlers health.  Calculating how much water to bring for a family of four is sometimes a difficult task because we have to determine who will be carrying all the water weight.

Whether we are day hiking, camping, backpacking or traveling internationally, the LifeStraw® will be something that will always come along on our family adventures.  Later on in the post you can enter in Rafflecopter for a chance to win your own LifeStraw® (enter below).

LifeStraw® product details:

  • Filters at least 1,000 liters of water (264 gallons).
  • Weighs only 54 grams (2 oz.)
  • Removes up to 99.99999 percent of waterborne bacteria.
  • Removes up to 99.9 percent of waterborne protozoan cysts.
  • Reduces turbidity by filtering particles of approx. 0.2 microns.
  • BPA Free and contains no chemicals.
  • Uses no bateries or moving parts.
  • It removes virtually all bacteria and protozoa parasites that can contaminate water and it reduces muddiness by filtering out particulate matter.
  • Swiss-based company Vestergaard originally introduced LifeStraw® as an emergency response tool and it has been used by millions of victims of floods and earthquakes.  LifeStraw® has also been used to fill the need for safe water in non-emergency situations in developing countries.

The Pluses!

Alpine water freshness!

  • Easy To Use ~ If my two year old daughter can do it, anyone can.  If you can drink from a straw you can use the LifeStraw®.
  • Motivation to Hydrate ~ Sometimes my children are so excited to be outdoors that they forget to drink water.  The LifeStraw® motivated my children to drink because it was fun to drink from the lake using the LifeStraw®.
  • Lightweight & Easy to Carry ~ When backpacking every ounce counts, so having a lightweight personal water filter is always a plus.  It also has lanyard-type necklace that can worn around the neck or attached to a pack.
  • Humanitarian Aid ~ When you purchase a LifeStraw® product, a portion of the funds goes to provide water purifiers for African schools.
  • Refreshing Water ~ Sometimes after hiking all day, all I want is cold water yet the water I bring is lukewarm.  Not refreshing at all!  With the LifeStraw® I can drink straight from the COLD alpine lake and satisfy my thirst!
  • Affordable Pricing ~ The LifeStraw® retails for $19.95, which can filter 1,000 liters or 264 gallons of water, overall that is a very low cost for that 1,000 liters of water!


The Minuses

My only "minus" about the LifeStraw® is that if you are not near water, then you are out of luck.  I normally day hike in the San Francisco East Bay hills where there is hardly any natural water sources so I have to bring in my own water most of the year.  Yet, we are always heading out to locations like the California Sierras or the Peninsula where there are lakes, creeks and rivers so it is still very useful.


Chasqui Mom Last Thoughts...

I can see many uses of the LifeStraw® outside the use in the outdoors, like traveling internationally to countries which might not have safe water to drink, or after a natural disaster like floods and earthquakes.  Water is one of the 10 essentials when heading outdoors and I'm glad I have a easy to use, lightweight LifeStraw® to keep my family hydrated and safe.


LifeStraw® has graciously provided a LifeStraw® personal water filter to giveaway!  This giveaway is open to U.S. residents only, no PO Boxes.  Contest starts June 30, 2014 12:00 a.m. PST until July 6, 2014 11:59 p.m. PST.  Winner will be announced a couple days after the giveaway has finished.  Please use the Rafflecopter below to submit your entries and good luck! [THIS GIVEAWAY IS NOW OVER]

a Rafflecopter giveaway


The LifeStraw® product and information have been provided by Vestergaard.  As always these are my true and honest opinions.

Join in on the conversation by leaving a comment here! You can also join in on the conversations on Chasqui Mom's FacebookInstagram and Twitter that is updated daily with outdoor activities and other wonderful posts and links from #OutdoorFamilies!

Family Hiking Milestone: 13 Miles at Henry Cowell Redwoods State Park

It's been four months, since our milestone hike: 13 MILES with our toddlers.  I think I have emotionally, physically, mentally, spiritually have come to grips with it.  Believe me this isn't our normal deal when we hike with our toddlers but we were meeting up with some Twitter Hiking All Stars: Russ Beebe ~ Winehiker WiticulturePaulina Dao ~ Little Grunts and David Wherry ~ Hiker Adventures.

Yes, it rain a few times in California this year.
My husband had been captive to his cubicle for a couple of weeks, so an 8 mile hike sounded like a good time and a good workout since we knew we would have to carry the kids most of the way.  My daughter can barely hike 1/2 mile but my son had hiked up to 5 miles in the past, so we planned to carry them quite a bit.  Nothing that we haven't done before but...family hikers pace vs. non-kid hikers is completely different, primarily in how fast/slow one hikes.  Either way we were up to the challenge.

It was a rainy day (WHAT?!) in the San Francisco Bay Area, as we headed out to Felton in the Santa Cruz Mountains.  The second we started hiking in the rain, I had immediate flash backs to hiking in the Peruvian Andes and it put me in a great mood.  Our kids hardly ever hike in the rain, but of course they enjoyed splashing in the puddles.

Russ, Paulina and David were in the front of the pack and we were in the back.  Our kids like to play the "in-and-out game" for the first hour of hiking, until we encounter an uphill they don't want to hike.  I can't remember all the details of our hike, now four months behind me but the things that stood out in my mind were:
  • Green ~ Everything was GREEN!  The Bay Area, especially the East Bay is brown ahem...golden most of the year and only turns green during the winter rains.  In this severe drought year, there was only like a 4 week period where water was flowing in our seasonal creeks and everything was green.  It was really refreshing.
  • Big Ben Tree ~ Not really too much to say about this except show pictures.
The whole familia fits inside Big Ben. Photo Courtesy of Little Grunts.


Getting to 13 miles....

We all were having a blast enjoying snacks, resting, taking pictures and eating that we took a little wrong turn due to so many fallen trees on the trail as well as many trail markers were destroyed or removed (see WineHiker comments below).  We realized our mistake 2.5 miles out from where we should have taken our trail, putting us at 5 miles added onto our 8 mile hike.  A 13 mile hike isn't all that difficult as a day hiker, but when you have 30-50 lbs of human plus snack, water and gear every step is well....hard.  I think I really earned my hamburgers and fries that day.

I'm smiling but I'm crying inside! Photo Courtesy of Hiker Adventures

Well, there was nothing we could do but hike and hike as fast as we could because the winter daylight was short.  I don't know what happened with my children, I think God answered my prayers as we hiked along that kids wouldn't have a meltdown.  With a steady flow of candies, I mean snacks...water, being carried, singing, hand holding, my two and four year old made this 13 mile trek at Henry Cowell Redwoods.  At one point my husband carried both our toddlers because they both wanted Daddy to hold them.  Russ turned to me and said "Is that fair?" and I said, "I carried them for 9 months each, 1 mile won't kill him."

Oh by the way, did I tell you we calculated that our son hiked SEVEN of the THIRTEEN miles!
That's my boy!


I don't know what else to say about this hike, it was beautifully hard but worth every minute. It was a great family hiking milestone that we got to share with some great people.  What stands out the most in my mind now, is that the next day as my husband and I laid on our living room exhausted, Mr. David Wherry was running across the Golden Gate Bridge.  Oh someday, we will no longer be kid-carrying sherpas!  More pictures please and pass the cheese....

Group effort to get across! Thanks David and Russ!! Photo Courtesy of Little Grunts.

Lime Kline left overs....

Fun Times!

These niños....

Trail Report Detials
Who: Five Adults, Two Toddlers
Family Friendly: Very Difficult (due to distance)
Mileage: 12.9 miles, 13+ with extra walking around


Elevation Change: 2625 ft
Trails Description: Pretty much up a mountain and back down.


Trails: Bennet Creek Trail - Fall Creek - South Fork - Cape Horn - Lost Empire - Big Ben Tree (Not the Trail, the actual tree).  We continued onto Lost Empire Trail, instead of taking Big Ben Trail for the added five miles.  Continue onto Big Ben Trail and take Fall Creek Trail all the way to the Parking Lot.  


I'm glad I know what my family is capable! What is your family's hiking limit? 


Related Links and Posts:

  1. Henry Cowell State Park: Big Ben Loop #winehike by Little Grunts
  2. Henry Cowell Redwoods State Park Wine Hike by Hiker Adventures
  3. Henry Cowell Redwoods State Park ~ California State Park Website


Join in on the conversation by leaving a comment here! You can also join in on the conversations on Chasqui Mom's FacebookInstagram and Twitter that is updated daily with outdoor activities and other wonderful posts and links from #OutdoorFamilies!

Cleaning Up Limantour Beach ~ National Trails Day

From the mountains to the oceans, there's something I usually see on the trail that I really don't like...trash.  Everything in nature is interconnected so when someone leaves a piece of trash in the California Sierra Mountains at some point rain, creeks and rivers will sweep it to the ocean.  We have made it a habit to pick up trash when we are hiking, so on National Trails Day we decided to volunteer for a beach clean up!


National Trails Day was founded by the American Hiking Society in the late 1980's to celebrate America's magnificent Trails System. During the first Saturday of every June, many events are organized such clean ups, hiking, bird watching, biking, trail restoration and much more.  Since we always do everything as a "familia", I was happy to find out that even my toddlers could participate at beach clean up which was being hosted by the National Park Service and Point Reyes National Seashore Association at Limantour Beach on National Trails Day.


At first sight, Limantour Beach at Point Reyes National Seashore looked very clean and I was somewhat disappointed that maybe we were not going to be able to find much to clean up but we were wrong.  Our family alone found a brick, lots of shotgun shells, Styrofoam pieces, cigarettes, hair barrettes, bottle caps, straws, razors, Easter Basket plastic grass and more trash that we couldn't identify.  Combined all 23 beach volunteers picked up over 900 pounds of beach trash which included a large fishing net and a 20 foot plastic beam that weighed over 600 pounds.  We actually had a break and snacks on the plastic beam and we wondered "How in the world did THIS get here?!"

For more photos of the Limantour Beach clean up and trail restoration please click HERE.


Chasqui Mom Last Thoughts...

We enjoy the outdoors quite often by hiking, riding, camping and backpacking, but it was fantastic to volunteer our time and enjoy the outdoors by making it a cleaner world.  My children might not remember this specific event at Limantour Beach but they were left with a lasting impression that trash belongs in a trashcan.  Every time we are out and about and they see trash we pick it up, whether it's on the trail or on a neighborhood walk.  


This year I have had the honor of joining the American Hiking Society Board of Directors and I look forward to serving America's hikers in the following years.  Jennifer Chambers, the Chair of the American Hiking Society Board of Directors is also a outdoor family blogger at Hiking Along and also had a great clean up at Northwood Chesapeake Bay Trail.

Head on over to Hiking Along and read about "Celebrate Trails?"

A few of my fellow outdoor family bloggers enjoyed National Trails Day by Hiking!!

Photo courtesy of Tubbs Snowshoes. Moosefish kids!!

Moosefish - John Soltys sand his family joined Tubbs Snowshoes on a hike to Serene Lake in Washington! Oh the joys of hiking with kids and encountering different people on the trail. [Picture above]

Wild Tales of - Kate and her family headed out to Seward Park located in Seattle on Lake Washington.  It's always great to hit the trail as a family including our pets!

On The Beaten Path - Even though Jill and her family are in Canada, she wanted to feature The Sunset Coast Trail, which her family backpacked in May!


How and where did you celebrate National Trails Day?


Join in on the conversation by leaving a comment here! You can also join in on the conversations on Chasqui Mom's FacebookInstagram and Twitter that is updated daily with outdoor activities and other wonderful posts and links from #OutdoorFamilies!

"Sleeping Under the Stars" Family Project


As the Polar Vortex crippled the rest of the North America this past winter, California was experiencing an extremely warm winter.  One warm winter night, my husband and I were reminiscing about backpacking/camping as we were making our summer outdoor plans.  I was inspired by a fellow outdoor blogger, Tanya Koob's "The Camping Project" where her family camped 40 nights from May to September!

We decided that since we were experiencing 70 degree weather in the middle of January, we were going to take advantage of our warm weather and go camping!  One thing led to another and we came up with a little project:

Camp outdoors for at least one night, each month for the entire year

For the past FIVE months we have been able to to continue with our goal with a combination of camping and backpacking:


We currently have plans to "Sleep Under the Stars" until August and I'm pretty sure that we will be able to complete our year long project into the Fall and Winter months with some planning and maybe visiting some yurts!

My kids love sleeping in our tents so much, that they ask to set up our tents when we are just day hiking! I encourage you to join our family with our little project and discover how fun it is to make "Sleeping Under the Stars" part of our lives more than a couple times year!   In 2013, President Obama declared the month of June as Great Outdoors Month but my wish is that everyone enjoys the Great Outdoors all year long as we are doing with our "Sleeping Under the Stars" family project.


What are your family's outdoor plans for the Summer?


Join in on the conversation by leaving a comment here! You can also join in on the conversations on Chasqui Mom's FacebookInstagram and Twitter that is updated daily with outdoor activities and other wonderful posts and links from #OutdoorFamilies!

Happy Times at Black Diamond Mines: Family Backpacking [Video]

We truly had happy times at Black Diamond Mines Regional Preserve.  Backpacking with children is ALWAYS an adventure, lots of fun and work! For our first backpacking trip of 2014, we chose a local overnight trip to Stewartville Backpack Camp at Black Diamond Mines in Antioch, CA.  


This a family-friendly 3.2 mile hike-in camp in the East Bay hills.  Trip Report will be coming soon! Until then enjoy my little video of our fun and successful backpacking adventure with our little ones!


Thank you for watching!!


Related PostsSnake Encounters on the Trail with Kids


Join in on the conversation by leaving a comment here! You can also join in on the conversations on Chasqui Mom's FacebookInstagram and Twitter that is updated daily with outdoor activities and other wonderful posts and links from #OutdoorFamilies!

Snake Encounters on the Trail with Kids

On our most recent family backpacking adventure at Black Diamond Mines Regional Preserve, my family had two encounters with snakes.  Prior to heading out on the trail, the ranger showed our family the difference between a rattlesnake and gopher snake at the visitor center.  My children were immediately terrified due to all the noise the rattlesnake was making, but they slowly came in closer to the cages for a better look.

Selfie with a Rattlesnake

Hiking with kids slows down everything so ALL my snake encounters have been with my children.  I never saw snakes before we had children, not because they weren't there but because we probably hiked right past them and never saw them.  All our past snake encounters have been at a safe distance and since our children were small, they were high in their carriers.  FYI, no one got hurt during our last encounter except that I aged about 10 years from the scare.


1st Encounter - Rattlesnake: What Happened?
A mile into our first backpacking trip of the year, as were reached the picnic area of the park we took a little spur trail that crossed into some empty horse corrals.  My 4 year old son is the designated  "gate opener", so he opened the gate so the family could walk in.  Not more than five feet passed the gate, was a rattlesnake protecting a squirrel that it had just killed but my husband nor I saw it.

The victim....

As my son ran to catch up to my husband (three feet away from the rattlesnake), he suddenly saw and heard the rattlesnake and immediately turn around and started running, crying and screaming.  It was a DEATH scream.

I immediately got tunnel vision and all I could only see was my little boy running from a coiled rattlesnake ready to strike.

I grabbed my son, almost fell over as I dragged him to a safe distance, while my husband tried to catch his balance and run away with about 70 lbs on his back.  My husband's pack was 43 lbs alone, but our daughter was in the carrier during the rattlesnake encounter which made him very off balance.

We quickly made it over to the asphalt and headed to the picnic tables for a long break.  We explained to the kids that they did a great job protecting themselves and that the rattlesnake was probably more scared of us.  Our son was a little more shaken up than my daughter....she actually said "The rattlesnake is so cute!".

Out of mere morbid curiosity, I went back (by myself on the asphalt) to the scene of the crime to see if I could see the rattlesnake but all I found was a dead squirrel waiting to be eaten by the rattlesnake.  My mind was playing tricks on me and all the sticks looked like snakes near the squirrel, so I went back to the picnic tables.


2nd Encounter - Gopher Snake: What Happened?
As we reached the second mile, my son walked towards the gate to open it and my husband calmly said, "Snake".  This time my son did not scream but stepped back quickly and I immediately identified it as a Gopher Snake, which my son said "Mommy THAT one is not a poisonous one!!" and smiled.


We watched it for a few minutes, talked about the Gopher Snake and waited patiently until it slithered away into the grass.  We congratulated the kids again for being calm and careful on our second snake encountered and continued on with our trek.

A Few Learning Points
Of course these aren't the only things to do to protect against snakes, but more of "What I Learned" from our double snake encounter:
  • Talk to your kids about snakes and other wildlife BEFORE heading outdoors.
  • Learn about the types of snakes that are in your area and teach your kids how to identify them as well.
  • If you have a "scary" snake experience, talk about the incident later when your kids are calm.
  • Hiking "Sandwich" Order: Adult - Children - Adult.  To protect children from snakes and other wildlife.
  • Check out "Snake Safety While Hiking" by Walk Simply, about hiking with kids and snake encounters. 

Please refer to the California Department of Fish and Wildlife "Rattlesnakes in California" for more information on protecting yourself and what to do if someone gets bitten.  Also please educate yourself about the snakes in your area.

Snakes are a part of nature both in the outdoors and our urban areas.  There is a fear factor in snakes but that fear is diminished as we learn that they are part of the Nature-s Cycle of Life.


Have you ever had a snake encounter with your kids?

Join in on the conversation by leaving a comment here! You can also join in on the conversations on Chasqui Mom's FacebookInstagram and Twitter that is updated daily with outdoor activities and other wonderful posts and links from #OutdoorFamilies!

Road Trip Camping: Pismo State Beach ~ North Beach Campground

We love to road trip for any reason!  Mainly because we get to see more of our surroundings and it's usually less expensive than flying a family of four anywhere.  Our latest adventure took us on a road trip to Pasadena for the American Hiking Society Board of Directors meeting.  Road tripping  allowed us to bring more of our regular car camping gear unlike our previous camping trip where we flew to Orange County.


This year we have been lucky enough to camp three times on California State Park coastal campgrounds: Half Moon Bay State Beach, El Capitan State Beach and now Pismo State Beach - North Beach campground.


The Campgrounds

In most of my previous beach camping California experiences, beach camping is not really camping on the beach! The campgrounds are usually near a beach but not on the sandy beaches, North Beach campground at Pismo State Beach is no different.  The one thing that stood out about North Beach was the SPACIOUS campgrounds!


Having spacious campgrounds are really great for car camping because we normally set up our mansion tent, but on this occasion we brought our backpacking tent which looked really tiny in our giant campground.  In the picture above, my husband is walking in the campground next to us (empty) and the neighboring camp was the 1st RV in the distance.  The large space did allow our kids to run around and climb trees without worrying about them running into the next campsite.

Almost everyone there had LARGE RV campers, except for us and a few other tent campers.  The tent campers were the minority but once again everyone turned off their generators at the appropriate times.  I have noticed that a lot of coastal campgrounds draw the RV camping crowds.  The RV campers at North Beach were very luxurious and people would lay out rugs, patio furniture, plastic flower decorations, etc.  There was a lot of glamping and comfort camping going on at North Beach.


Location: Pismo Beach, California - 80 miles North of Santa Barbara (Google Map & Campground Map)
Reservations: Seasonal on Reserve America, otherwise walk-up 1st come 1st serve
Daily Price: Off Season Walk Up Rate $25/Night - On Season check Reserve America
Facilites: Drinking Water, Restrooms, Showers, Fire Pit and Tables


North Beach

We arrived at our campsite just before sunset, so we quickly setup our tent and headed for the beach.  I love watching my California sunsets and we had been promising our children to play at the beach for a couple of hours, so we made sure we got there before the sunset.

Pismo State Beach ~ North Beach and Pismo Creek
There are two trails at North Beach campground: Beach Foot Trail and Meadow Creek Trail.  Beach Foot Trail is the path to the actual beach, not an actual hiking trail but a walkway to the beach that passes the campground amphitheater and bathrooms through a eucalyptus grove.  The Meadow Creek Trail (which we did not explore) heads off to the Monarch Butterfly grove and loops around the Pismo Beach Golf Course according to the map.

Beach Foot Trail and the Amphitheater

The sunset was gorgeous and even though it as quite chilly the kids splashed around in Pismo Creek and made sand castles until it became dark.  Dinner was at a Old Juan's Cantina less than 2 miles south of North Beach Campground, near the south end of Pismo State Beach - Oceano Campground.  Unless we are full blown car camping we usually eat out for dinner.  No mess or cleanup at the campsite.

The next morning we cooked breakfast before we headed out to the beach one more time.  The kids were going to be in the car for a few more hours before we arrived to our final destination in Pasadena, so we wanted the beach to tire them out.  We made more sand castles, found sand dollars, ran away from the waves and walked up and down the beach.


This year we have been camping quite often at California State Parks, especially along the California coast.  Even though I prefer a more rustic, out of the way campsites, I am truly enjoying my California State Parks this past winter and spring.


Have you ever had the pleasure of visiting one of California's great State Parks?


Join in on the conversation by leaving a comment here! You can also join in on the conversations on Chasqui Mom's FacebookInstagram and Twitter that is updated daily with outdoor activities and other wonderful posts and links from #OutdoorFamilies!


Related Posts and Links:

  1. Chasqui Mom's California State Park Visits
  2. Pismo State Beach - California State Parks

Hiking the California Coast: Tomales Point ~ Point Reyes National Seashore

Point Reyes National Seashore is a National Park jewel in the San Francisco Bay Area.  Point Reyes will always have a special place in my heart, because it was where we had our first family backpacking adventure.  Not only is Point Reyes a great place for family backpacking, it also has many fantastic location for numerous day hikes.


Ever since my husband and I "discovered" Point Reyes we have always wanted to hike out to Tomales Point, but we just haven't found the opportunity to make it there.  Even though Point Reyes is in the San Francisco Bay Area, it's still 2.5 hour drive to reach the trail head from the East Bay!  It was definitely worth the drive, since we had an out-of-town guest coming to California for the first time.  We wanted to show the beauty of the California coast, so off we went to Tomales Point.


Hiking the California Coast

When you think about hiking on the California coast, everyone thinks about warm sunshine, beautiful views of the Pacific ocean and cliffs.  I would say that on all our coastal hiking outings: Año Nuevo SPRancho Corral de TierraBaker BeachPirates Cove and Backpacking Point Reyes have been for the most part, completely the opposite of sunny/warm and Tomales Point was no different!


Weather Conditions ~ The majority of the hike was foggy, it wasn't until 4 p.m. that the sun FINALLY broke through the fog.  It was cold, misty, foggy and windy during most of the hike and then winds became stronger after the sun broke through the fog!  I was almost knocked down a couple times near "Windy Gap" by the gusts!  I normally bring multiple layers for myself and especially for the kids since they get cold sitting in the carriers.

Foggy trail near same location below

Fog-less Tomales Point  
I usually do not like "Out and Back" trails because I want to see new scenery the entire hike but since it was foggy one way and sunny on the way out, it was like two completely different hikes!  Everything looked different from the foggy morning hike.  We were also able to see the tide roll into Tomales Bay, which none of us have ever seen before!

Bird Rock in the Pacific Ocean
Trail Conditions ~ Tomales Point Trail is an out and back trail, 4.75 miles (one way) for a total 9.5 miles.  We were aiming to hike to the bluffs but we were not committed since 9.5 miles is a really long hike with toddlers.  We did not complete the entire trail, we opted out to not hike the last 0.5 miles to the bluffs (see trail report below).  Everything I read about this hike said it was an easy "10 mile" hike but everything takes twice as long with kids.  With that said, my toddlers LOVED this hike and the adults did too!

The trail itself was mostly single track with some wider trail sections.  It was a combination of hiking on beach sand and compact dirt.  A huge motivator to get my kids hiking and out of the carriers is SAND. There was a trail section where we were hiking uphill (with toddlers on our backs), in sand, "bushwhacking" our way through the tall wildflowers...I don't know about you but that was HARD.  I made it about 20 ft and then my daughter yelled "Ooh sand!! I want to get out!!" and I happily let her out.  My kids love to bring their shovels in case they find sand on hikes. 

Getting There ~ Tomales Point Trail Head is at the end of Pierce Point Road a 40 minute drive from the Bear Valley Visitor Center, which I highly recommend visiting.  Directions to Tomales Point Trailhead.


Abundant Wildlife

One of the main attractions of Tomales Point is the wildlife, in particular the Tule Elk.  I was hoping to see a few Tule Elk but I was surprised that we hiked all day with the Tule Elk.  Of course we always kept our distance since wildlife should never be disturb, but we took many moments to just stop and stare at these beautiful creatures.  National Park Service states that "In 2009, over 440 were counted at Tomales Point" and we definitely saw at least 50 elk during our hike.

Can you find the Elk scratching it's ear like a dog?

Seeing wildlife with kids is really amazing, so many teachable moments that I will need to write another post about it soon.  My kids haven't really grasped the concept of specific type of animals, so when we told them those animals were "Tule Elk" they just gave us blank stares.  When I told them they were kind of like deer they were a little confused because they didn't look like deer.  It wasn't until we saw the bucks with antlers, that my toddlers were satisfied with telling me that we were hiking with "Reindeer". 

Why did the turkey cross the road?
We also found some wild turkeys crossing the trail.  As we let them cross our path, I joked with our children that we were going to eat them and my son turned around and said "Mommy, we don't eat turkeys!".  Sorry buddy, we do and they are delicious!  Wild turkeys are not native to Point Reyes National Seashore, so maybe we could have eaten them...


Wildlife Proximity ~ We've had a few close wildlife encounters in the past, so we are very careful when wildlife is nearby.  As we were hiking along the ridge, a herd of Tule Elk (bucks) ran across the trail 30 feet ahead of us.  The low bushes hid the elk, so we could not see them until they were running across the trail (picture above).  Thankfully we had our "herd" of children near by and my daughter (two years old) was up high in the carrier. My daughter was able to see the herd running and said, "Daddy, that is beautiful!".


Wildflowers Galore

I have never hiked where I was completely surrounded by wildflowers.  My hiking ground is the San Francisco East Bay hills that dry up the second the rainy season stops, so all the hills surrounding me are currently golden brown with a few sparse wildflowers.  The California coast stays a little more damp due to the fog, so even our precious California Golden Poppies were out in droves!


The one flower that stopped us in our tracks was the Cobwebby Thistle - Cirsium Occidentale (spiky pink "flower").  We found it near the last mile of the Tomales Point Trail, the closer we got to the end the more abundant they became.  I could only identify the California Golden Poppy, and some type of purple lily but we were always surrounded by wildflowers.  If you have allergies to pollen, I would suggest waiting until wildflower season is finished because we were covered in pollen!

My daughter was in HEAVEN...she absolutely loves flowers, one of her favorite things about the outdoors.  It took us forever to walk through the field of flowers (about 4 ft high) because she had to stop and smell all the flowers.  I had to "part the waters" with my hiking sticks so she could walk through and not get hit in the face.


Trail Report Details

Who: Four Adults, Two Toddlers
Family Friendly: Difficult
Mileage: 8.5 miles Round trip


Elevation Change: 1256 ft
Trails: Tomales Point Trail (Out and Back) 


Approximate Time: 4 hours (Moving time) ~ 7 hours 15 mins (Breaks Included)
Method: Toddlers Partially Hiking/Carriers


I would not suggest this hike in its entirety for families new to hiking, hence the difficulty rating but if your are used to hiking with your kids this hike would be a great all day hike.  A more family friendly hike at Tomales Point Trail would be hiking to Windy Gap (approx 1 mile - 2 miles roundtrip) and exploring the barns near the trail head.  I absolutely loved this hike, from the wildflowers, wildlife to hiking the beautiful California coast, Tomales Point is a hike definitely worth the drive, effort and time.  


Have you been to Point Reyes National Seashore before?  If so what parts?


Join in on the conversation by leaving a comment here! You can also join in on the conversations on Chasqui Mom's FacebookInstagram and Twitter that is updated daily with outdoor activities and other wonderful posts and links from #OutdoorFamilies!


Related Posts and Links:
  1. Point Reyes National Seashore - National Park Service Site
  2. Backpacking at Point Reyes: Day 1, Day 2, Day 3

About Chasqui Mom

I am a California native, born to Peruvian immigrants hence the ode to my heritage, "Chasqui" Mom.  I am a stay at home wife and mom to my wonderful husband and two wonderful children.  The outdoors adventure "bug" runs through my veins since many generations ago, from my ancestors hiking from the high Andes mountains to the Amazon basin in Peru, to my parents month long backpacking trip from Peru to Los Angeles, California in the late 1970's.

I live in the San Francisco Bay Area and most of my outdoor adventures are based in the Bay Area or Northern California.  Family oriented outdoor activities is my main focus of most of my ramblings but my previous hiking adventures prior to entering the world of motherhood are also included.

In addition to being a Outdoor Family Blogger, I also strive to encourage all families and in particular Latino families to learn to enjoy the outdoors in anyway they can.  In 2014, I had the honor of joining two great outdoor non-profit organizations:


               American Hiking Society, Board Member                              Latino Outdoors, Regional Coordinator
                        Board of Directors ~ 2014                                                      San Francisco Bay Area


I look forward to exploring the outdoors with my family and my youth students, partnering with companies and non-profit organizations to help everyone discover the world around us.


Thank you God for creating such a wonderful Earth to explore!

Melissa Avery

To contact me directly please click here.

Spring Time Camping in the OC ~ O'Neill Regional Park

On our most recent trip to Southern California, we decided to add a little Orange County (OC) camping to my husband's business trip.  Thankfully, through my blogging connections, I have met many wonderful #OutdoorFamilies like Traci of Walk Simply, whose outdoor playground is The OC!  She recommended that we camp at O'Neill Regional Park as her family did!


We were not planning on a full blown camping trip, since we traveled by plane but we love to find any excuse to camp.  It was our first time ever camping at a regional park, aka a LOCAL park!  We've camped in National Forests, National Parks, State Parks but never a regional park (county-run), not even in my regional parks in the San Francisco East Bay!  So this was the first time ever camping in a regional park, OC Parks.

Location: Trabuco Canyon, California - 7 Miles East of Lake Forrest
Reservations: Orange County Parks (ReserveAmerica.com), Year-Round
Daily Price: $20/night - (Date Camped March 2014) - 79 campsites
Facilities: Drinking Water, Restrooms, FREE showers (hot water), Playground, Campsite Tables, Fire pit w/grill


We stayed at Arroyo Campground Loop, Site 66, which was very spacious and had trees nearby large enough to support our hammock.  Trabuco Creek (seasonal creek) runs along the backside of half of the campgrounds.  As you can see, the creek was completely dry but that allows for dry creek-bed explorations for little ones!


Close to Everything

Normally when we camp we like to "get away" from it all, but it's a little difficult when we are hybrid traveling (business/pleasure), since we flew down to Southern California and did not have all our regular camping gear.  We were close to everything but still far enough that I could feel the outdoor fresh air.  My main concern was food, since we did not have a means of refrigerating our food.  That was one of the reasons we picked O'Neill Regional Park because everything was a 10 minute drive to Lake Forest and Rancho Santa Margarita:


  • Supermarkets 
  • Drugstores
  • Banks
  • Shopping Centers
  • Restaurants
  • Churches
  • Playgrounds (in the park)
Playground: We've never been camping at a park with an actual playground.  I'm normally not too fond of playgrounds, but in this particular case I really loved having a playground, we could burn off our kids energy since we were not hiking at this campground.  It was a small plain EMPTY park.

Food/Restaurants: I love eating out and on this particular trip, I was in the mood for Peruvian food and lo and behold, there was Inka Mama's Peruvian Cuisine down the hill from O'Neill Regional Park in Foothill Ranch.  The food there was delicious, if you are ever in this area I highly recommend eating there. There is every kind of restaurant that you can think of 10 minutes away from O'Neill Regional Park, so you can find anything, even for picky eaters.

Wildlife at O'Neill

Even though O'Neill Regional Park is very close to the city, there is wildlife.  As we were eating breakfast at our campsite we heard a VERY loud squawking from the trees.  I told my husband that those noises sounded like the tropical birds we heard in the Peruvian Amazon jungle.  So of course, I had to investigate the empty campsite across from us and I found bright two bright green red-headed birds or a Red-Crowned Parrots (popping out from the center tree hole).  I even tweeted it out to the Audubon California to try to figure out what these birds were.


O'Neill, like many other California parks, has larger wildlife like mountain lions, bobcats, rattlesnakes and mule deer.  Of course we didn't see any of those animals, only the Red-Crowned Parrots and angry red ants!!


O'Neill at a Glance....

We used O'Neill as a "base camp" for other OC outdoor adventures to the beach and hiking.  It was very well maintained campgrounds and facilities.  By Friday, the campground was completely full but everyone one there respected the "camping rules" and we enjoyed our family time at O'Neill.  Camping might be a little more difficult than staying at a hotel because there is setup involved, but over all I feel more relaxed camping than staying at hotels.  Plus it creates beautiful family memories with our little ones.  


Sometimes as outdoor enthusiasts we look over our local regional parks and we might be missing out on some great locations to enjoy the outdoors.  I love National Parks, National Forests, State Parks but they are a little far from us, so I'm really learning to find great outdoors in regional parks even when we are traveling!


Have you camped at a local regional park? Give a little shout out to your regional parks!


Join in on the conversation by leaving a comment here! You can also join in on the conversations on Chasqui Mom's FacebookInstagram and Twitter that is updated daily with outdoor activities and other wonderful posts and links from #OutdoorFamilies!

Gear Review: The Handy Qlipter by Lulubop

It seems like anytime I go out with my children, I wish I had an extra set of arms especially when I'm outdoors! On many occasions, my kids want to take a special toy or clothing item and I usually end up holding it for the rest of the hike, which is terribly annoying.  On one of my most recent hikes, I noticed I had nothing to clip my kids wet, muddy shoes to the outside of my kid carrier!  I eventually tied them onto the side of my carrier with the shoe laces but they eventually fell off because the shoelaces were so wet and muddy.


Thankfully I received the The Qlipter in the mail a few days later and I have been using it on almost every outdoor activity I do with my kids, especially day hiking!  The Qlipter is classic carabiner (non-climbing) but with a major upgrade: a swivel 360 degree hook, plus some new securing features.


  • Size/Weight: 3 5/16 inches wide by 4 5/16 inches long (closed) 7 1/8 inches long (open) ~ Approx 2 ounces
  • Multiple Colors: Black, Blue, Classic Red, Gray, Fun Red, Kickstarter Green (temporary).
  • Retail Price: A pledge of $20 on Kickstarter Project, Delivery August 2014 (Project Goal met)
  • Product Material: Aircraft Grad Aluminum Alloy

Photo Courtesy of  The Qlipter by Lulubop

The Pluses!

Sturdiness ~ The Qlipter can hold up to 50 lbs!  I've only used to to hold shoes, shovels and hiking poles but I'm glad to know it can hold that much weight, like our backpacks while backpacking! Once again, this clip is not made for climbing activities and it is qualified to hold up to 50 lbs, non-moving objects.

Mulit-Use "Carabiner" ~ I've primarily used The Qlipter for attaching my kids shoes, toys and our hiking poles to my backpack/kid carrier on our day hiking trips.  In the picture below my daughter was adamant about taking her shovel on our hiking trip  (pictured below) and when she got tired of holding it was attached to The Qlipter, not in my hands.  I am looking forward to using The Qlipter on camping and backpacking trips, where I can see more uses such as in using the hook feature for lanterns, keeping stuff off the ground and hanging clothes.

Lightweight ~ As a hiking/backpacking family weight is a very big concern of ours.  I'm always looking at weight of every piece of gear I own.  Not only do I carry my own gear, but my toddlers backpacking gear as well as my child.  Having a light two-ounce, sturdy, multi-use carabiner will not add to my weight concerns!

Secure End Cap ~ My past clips/carabiners (non-climbing) have always buckled, broken or always left a gap and our gear like our small kid shoes would slide off.  The Qlipter has a magnetic closure in the rubber end cap to make sure the closure is very secure.


The Minuses

Photo Courtesy of Kathleen Radtke-Fitzpatrick (right photo)

I had one issue with The Qlipter, difficulty looping it into to my particular kid carrier (featured on the left).  The Qlipter head was a little too large for the ONE loop, my kid carrier has.  I looped it through the tapered end but the carrier loop prevented the swiveling wide hook from locking.  I eventually clipped it through the "paper clip" and pushed through, in the picture above (left).  The Qlipter was secure but it took a lot of wiggling and pushing to get it onto my particular carrier!

Granted, it was more about the small size of my carrier loop with the large size of The Qlipter that caused this issue.  The Qlipter clipped on with NO difficulties on my regular day pack and my husband's kid carrier.  The owner Mina Yoo, is already working on a smaller version of The Qlipter, which I am definitely interested in trying out!


Chasqui Mom Last Thoughts...

As an outdoor mom, I'm always looking for handy gear that will help me enjoy the outdoors better with my children.  The Qlipter keeps my hands free from toys, muddy shoes and keeps gear securely attached to my kid carrier.  The Qlipter is new kind of multi-use hook/carabiner that is great for family use in the outdoors.


I would like to thank Qlipter who provided this product for the purposes of this review.  As always these are my true and honest opinions.

Related Links:  The Qlipter by Lulabop


Join in on the conversation by leaving a comment here! You can also join in on the conversations on Chasqui Mom's FacebookInstagram and Twitter that is updated daily with outdoor activities and other wonderful posts and links from #OutdoorFamilies!

Twitter has Changed and @ChasquiMom Has Too!


Twitter has recently changed its profile desktop layout and as I was updating my profile, I noticed that my Twitter handle was the only one in all of my social media accounts that was not "ChasquiMom".  Instagram, Facebook, Google+, Pinterest, StumbleUpon all were the same except for Twitter which was @melissabravery.


To be consistent, I have now changed my Twitter handle to:


If you are a Twitter follower of mine, you should still be able to find me under my actual name "Melissa Avery" and now under my blogging name Chasqui Mom.  I'm going through my website and updating my links to my Twitter handle, but please let me know if you find any broken links.


Thank you to all my followers!


Join in on the conversation by leaving a comment here! You can also join in on the conversations on Chasqui Mom's FacebookInstagram and Twitter that is updated daily with outdoor activities and other wonderful posts and links from #OutdoorFamilies!

Chasqui Mom is on Board with the American Hiking Society

I love to hike.  Even though I do other outdoor activities, I am a hiker at heart.  Somehow in all the crazy world of social media I met the great Jennifer Chambers of Hiking Along and we collaborated on a few blogging posts together and got to know each other in the social media world of Facebook and Twitter.


Unbeknownst to me, I had been collaborating with the Chair of the American Hiking Society (AHS) Board of Directors for close to a year. When Jennifer asked me if she could nominate me to be on the AHS Board, I was a little shocked and truly honored.  Shocked in the sense of when I started "Chasqui Mom" I had no intent other than telling my stories, let alone being on the Board of Directors of the American Hiking Society.  I accepted her nomination and this past weekend I became a Board Member.

Of course being a "Board Member" of any organization sounds very rigid and boring, but when it's about something you truly love doing, in this case "Hiking" becoming a Board Member of the AHS intrigued my interest.  How I could use my abilities, background and knowledge to contribute to AHS mission.


Now, I know what you are thinking...What does the AHS do? 


AHS mission statement is...

"As the national voice for America's hikers, American Hiking Society promotes and protect foot trails, their surrounding natural area, and the hiking experience". "Mission Statement - American Hiking Society." American Hiking Society. N.p., n.d. Web. 30 Apr. 2014.

Yeah, But what do they do?

  1. Advocacy ~ AHS is the hikers voice to Capitol Hill.  They represent us, the "hikers," and work to protect our hiking experience, trails, etc.  In 2014, the AHS had its 17th Annual Hike The Hill in Washington DC.
  2. National Trails Day ~ AHS organizes the largest celebration of trails on the first Saturday of every June, with the local organizations and parks.  Events include, hikes, biking, horseback riding, trail work, and much more.
  3. Volunteer Vacations ~ Now everyone has a different meaning of vacation but the AHS coordinates week long vacations where, instead of lying on a beach, volunteers are working hard to maintain the beautiful trails that the rest of this nation is hiking on.  I don't know about you, but I've seen volunteers at work on the trails....that's hard labor.
  4. Resources & Membership ~ The AHS provides resources and memberships to both individuals and organizations.  Other than getting some little "perks" both the individuals and organizations get the satisfaction of knowing they are helping protect the places we all love to hike.
American Hiking Society, Board of Directors Spring 2014 Hike
Even though a Board Meeting is usually sitting in a conference room, reviewing documents, and planning for the future, I think it's still pretty awesome that the AHS Board of Directors, President Greg Miller and Vice President Peter Olsen finished our weekend of meetings with a six-mile hike to Henninger Flats Campground in the Angeles National Forrest!  And yes, they all were happy to have my family come along on the hike!

Now there is a Latina Hiking Mamá, youth leader, former law enforcement officer/accountant on the AHS Board and I'm happy to be volunteering my time for this nations hikers.


Join in on the conversation by leaving a comment here! You can also join in on the conversations on Chasqui Mom's FacebookInstagram and Twitter that is updated daily with outdoor activities and other wonderful posts and links from #OutdoorFamilies!

Spring Time Hiking at Basin Falls ~ Uvas Canyon County Park

Uvas Canyon County Park is a very small but beautiful park in the South Bay.  Located south of San Jose in Morgan Hill, this park contains about 6 miles of hiking, four waterfalls and creeks for everyone to enjoy.

Photo Courtesy of +Paul McWilliams.
On this occasion, I had a arranged a #HIRL (Hangout In Real Life) with a Google+ friend +Paul McWilliams and his family, and invited friends of mine.  Three - 2 year olds, one - 4 year old and five parents!! I was the only solo parent hiking with two kids, since my husband was riding the Tierra Bella Century that day! What a better way to spend the day hiking to waterfalls and meeting up with new and old friends.  It may have been the first +Google+ Toddler #HIRL history!

As hiking parents of little ones we knew that our mileage was not going to be long, so we aimed for the Waterfall Loop and if still felt energetic we were going to head to Triple Falls. Granted the latter never happened!

Waterfall Loop along Swanson Creek
Most of the hike was an uphill towards the waterfalls but it was not a difficult uphill since my two year old daughter hiked most of the way up. Still for toddler-carrying parents any uphill is a sweaty trek! We hiked counter-clockwise on Waterfall Loop, one side follows along the creek closely and the other side is a plain fire road trail. The creek-side trail, had actual creek crossings and bridges to walk across.  Two great features to keep kids hiking - water and bridges!

Creek Crossing!! ~ Photo Courtesy of +Paul McWilliams 

Bridges Make a Hike Fun ~ Photo Courtesy of +Paul McWilliams 
During a little carrier break, my daughter and I walked over to look at the flowers and she screamed, "Snake!!" and jumped backwards on the trail.  I only saw branches until a heard something rustle by my feet and saw something slither!! Of course I screamed and jumped back to where my daughter was standing but as I took a closer look it was a lizard carrying another lizard by the neck, I thought maybe they were mating but the lizard was definitely biting the other lizards neck.

After our lizard encounter, we continued on the spur and in a few minutes we were at Basin Falls which brought excitement to everyone, especially the little ones. There were lots of smiles from all the kids and parents when we saw the falls.  We tried to "relax" during our break at Basin Falls, but as always with kids, they are always trying to "not" fall into the water.

Chasqui Mom and niños!! Photo Courtesy of +Paul McWilliams 

Splashing at Basin Falls!! 
Basin Falls Spur - Photo Courtesy of +Paul McWilliams 
There was lots of splashing with sticks, rock throwing, investigating the water basin at Basin Falls and earthworms that came out out from under the leaves.  Lunch was eaten and after my daughter decided to not "accidentally" fall into the water, we packed up and headed back to Waterfall Loop (Fire road trail side).

Heading back! Photo Courtesy of +Paul McWilliams 

We took another spur to Black Rock Falls, which wasn't as impressive as Basin Falls but the rocks were black!


Most of the kids were done hiking by then so we hurried back to the parking lot.  Thankfully the rest of the trail was downhill so everyone was able to hike fast to the cars.


Trip Report Details

Who: Three families - Five Adults, Four Toddlers
Family Friendly: Moderate
Mileage: 2.8 miles roundtrip


Elevation Change: 586 ft
Trails: Counter Clockwise Waterfall Loop, Basin Fall & Black Rock Falls Spurs


Time: Approx. 1 hour 30 minutes (moving time)
Method: Toddlers Partial Hiking/Carriers


There aren't too many waterfalls in the San Francisco Bay Area, but cheers to family hiking and waterfalls that we do have!!


Waterfalls are great for family hikes! What is your favorite waterfall hike?

Join in on the conversation by leaving a comment here! You can also join in on the conversations on Chasqui Mom's FacebookInstagram and Twitter that is updated daily with outdoor activities and other wonderful posts and links from #OutdoorFamilies!

Related Posts and Links:

  1. Santa Clara County Parks - Uvas Canyon
  2. Chasqui Mom: South Bay Hiking

Gear Review: Hero Kit Road Bike Field Repair Kit

Entering the world of cycling is like learning a new language!  Lots of fun but there is also a lot to learn about "how-to's", new terminology and what to do if something breaks down on a ride. I must be honest my back up plan for a long time has been: "If something happens, I'll just call someone to pick me up."  I never carried a tube nor a pump and really didn't know how to fix anything on my road bike if something happened to me while riding.  Not a really good decision, but the Hero Kit for Road Cycling has changed that now!


The kit includes...

12 Function Multi-Tool w/Chain tool
Planet Bike Tire Levers w/tire patch kit
24 Page Waterproof Field Repair Instruction Manual
9 Speed KMC Replacement Chain Link
10 Speed KMC Replacement Chain Link
Yelo Velo High-PSI Tire Boot (Torn Tire Patch)
Frame Bolt and Cleat Bolt
Multi-Use wipe (aka Tush Wipes)
Emergency Rain Poncho
ICE (In Case of Emergency Car)
Duct Tape and LokSak (Kit plastic bag)


Regular Price: $45.00 


The Pluses!

Novice Friendly ~ I absolutely love the "Step-By-Step Instructions Tools & Materials" Manual because it explains literally step-by-step how to fix issues from a flat tired, broken chain to brake problems and more.  I'm the type of person that learns by doing rather than explaining, so having a detailed Instruction manual with a bicycle part chart is perfect for me to follow along while actually fixing the bike.  Hero Kit also categorizes the level of difficulty of fixing each issue and everything is labeled so a novice like me knows what is what!

Small Packaging ~ All the components of the kit are small, including the Multi-Tool.  The 12 Function Multitool folds down into a small rectangle and is pretty lightweight.  The whole kit fits into the LokSak (plastic bag) which is only 4.5in x 7in.  Being a hiker and now a cyclist I'm very concerned about weight, and this Hero Kit for Road Cycling total weight is 10.4 oz, (spare tube and pump not included).  This whole kit easily fits into my seat pack and would easily fit in a jersey back pocket.

It's small - 10.4 oz
Quality Product ~ When the packaging containing the road biking repair kit is a quality product, I know I have a great kit.  The LokSak has a patented Leakproof/Airtight Seal so everything inside stays dry!  Hero Kit made the manual waterproof and included a poncho just in case your day gets a little worse by being rained while fixing your bike.  The Planet Bike Levers have the tire patch kit tucked inside a little compartment, which is a great idea because I can imagine those easily flying away if they were loose in the bag.  Hero Kit's Multitool is very small but sturdy that includes a chain tool, which is great because I don't have carry our large multi-tool in our kit.  

Safety Centered ~ The kit itself is very safety centered, from protecting the rider from the elements to providing an ICE (In Case of Emergency) card that the rider can fill out.  We never like to think about biking accidents "What If's..." but having a card like that could help a passer-by or medical personnel save your life if you were found unconscious in a crash.


The Minuses

None really.  My only "minus" was that it uncovered my lack of knowledge of my very own bike but that is more of a reflection of me not the kit.  The kit has actually inspired to keep learning about bikes and riding.


Chasqui Mom Last Thoughts...

Being that I also ride with my kids, this will come in very handy with fixing any issues with my sons bike as well as my bike trailer.  It also provides me more confidence that I can go further distances when I'm riding solo and with my family.  My husband also occasionally commutes on his road bike during the week so we now share the Hero Kit.  In a good way, we still haven't had a chance to "use" the kit but I know it will definitely come in handy when we need to fix something in the future.  I highly recommend the Hero Kit for Road Cycling, as well as checking out other kits for Mountain Biking, Crash Kits and refill kits.


I would like to thank Hero Kit who provided this product for the purposes of this review.  As always these are my true and honest opinions.


Join in on the conversation by leaving a comment here! You can also join in on the conversations on Chasqui Mom's FacebookInstagram and Twitter that is updated daily with outdoor activities and other wonderful posts and links from #OutdoorFamilies!

Related Posts and Links:

  1. Hero Kit: The Repair Kit Revolution

Contact Me

Follow Chasqui Mom on all of the following social media outlets:


You can also contact me via email at: melissa@chasquimom.com

Writings and Photography
If you are interested in a topic or writing a guest post for my website, please let me know.  I am always open to new topics as well as being a guest writer for other websites in the outdoor community.  I also love sharing my photography with the world, please feel free to share any photographs I post on my social media outlets but if you want to share my photographs on your website send me an email prior to doing so.

Point Reyes National Seashore - May 2013
Winner of Wilderness Society Photo Contest 2013
Gear Review
I am available to do gear reviews on products geared towards family and the general outdoors.  We are a family of four, my husband, myself and our two toddlers under the age of four who are all avid outdoors individuals.

Travel and Tourism
The San Francisco Bay Area is a hub for local and international travel and even though it's an urban area, nature and "The Great Outdoors" is all around us to enjoy!  If you interested in partnering with me, I would love to promote your outdoor travel, family friendly and tourism business that caters to the San Francisco Bay Area. 

Non-Profit Organizations
My husband, Jesse and I are youth leaders at our local San Francisco Bay Area church and have started a "Wilderness Program" with our church's youth group which consists of Junior High and High School students.  We believe that in our urban society our youth lacks exposure to the outdoors and nature which provides many life lessons that can only be learned in the outdoors.  We are always willing to partner with other organizations who promote families and youth to go outdoors as well as partnering with other church's that are looking into getting their youth groups into outdoor activities.

Youth Camping Trip to Pinnacles National Park

Some great outdoor San Francisco Bay Area organizations are:

  • Latino Outdoors - Connecting Leadership, Cultura & Communities with Nature, Conservation, and the Great Outdoors.
  • Bay Area Wilderness Training  - Supports teachers and youth workers with training, gear, funding, and community.
For more family and general outdoor resources please visit my Outdoor Resources page.

To contact me in regards to any of the topics listed, please send me an email to the address listed above.  I look forward to partner with other outdoor enthusiasts!